

Hello everyone, welcome back to CybercityHelp. As we already informed you about PyCharm in our last article, today we are going to cover the remaining part that we couldn’t discuss earlier.
In our today’s article, we will be discussing PyCharm Installation. We will explain how you can install PyCharm on your computer and why installing PyCharm is important. So let’s get started.
What is PyCharm IDE?
Let’s first understand what PyCharm actually is. PyCharm is an Integrated Development Environment, also known as an IDE. You might be wondering why we need PyCharm when we already installed Python IDLE earlier. The reason is simple: PyCharm offers several benefits that make coding easier.
It provides intelligent code assistance, powerful debugging tools, smart navigation, and a very user-friendly interface. These features make your coding experience smoother. That’s why we recommend installing PyCharm.
How to Download and Install PyCharm IDE?
Alright, to install PyCharm on your computer, follow the steps given below. We have divided the installation process into simple steps so you can complete it easily.
Step 1: Visit jetbrains.com and download PyCharm
The first step is to download PyCharm IDE. Just open your browser and search for “Download PyCharm”. The first result you will see is usually “Download PyCharm: Python IDE for Professional Developers” from the official jetbrains.com website.
For example:

However, we will not download the Professional version because it only offers a 30-day free trial. Instead, we will download the Community Edition, which is completely free. Once you click on the Community Edition download option, you will see a prompt to save the file. Click on Save to begin the download.
For example:

Step 2: Set-up PyCharm IDE
Once the download is completed, the next step is to set up PyCharm. Open the setup file and allow the necessary permissions by clicking on Yes. After that, follow the steps shown below.
For example:

This interface may appear, so click on Next.

Then click on Next again without changing anything.

Tick all the boxes as shown in the screenshot, then click on Next.

Select JetBrains as the start menu folder where you want the shortcut to be created.

Now select the Python version installed on your system (for example Python 3.10) and click on Install.
You will see the default destination folder. Keep it unchanged and click Install.

The setup will begin. It may take a few minutes, so wait until the installation completes.

After installation, you will get two options: “Reboot Now” or “I want to manually reboot later”. Choose the second option and click Finish.
Step 3: Launch PyCharm
Now it’s time to launch PyCharm. Go to your search bar and type PyCharm Community Edition. Click on it. When prompted, select Do not import settings and click OK.
For example:
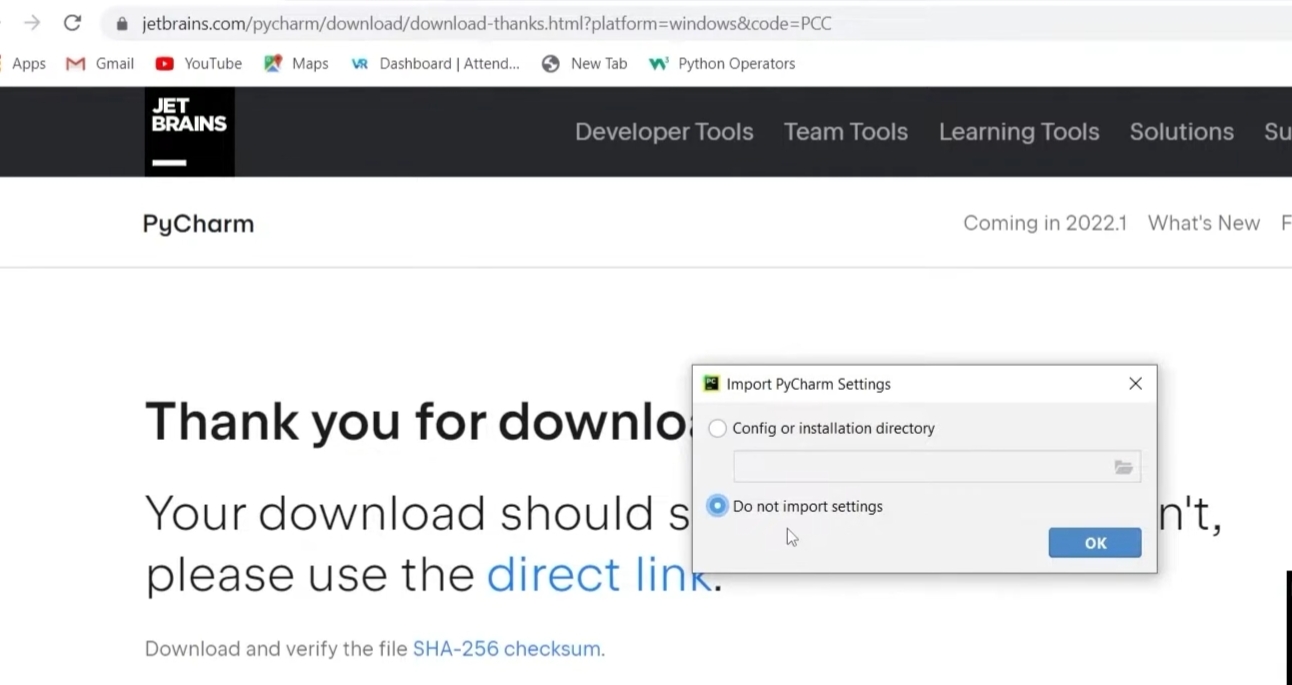
Your PyCharm is now successfully installed! Click on New Project to create your first file.
For example:

At the top, you will see the location where your project will be saved. PyCharm will also create a new virtual environment for your project. Click on Create and close the pop-up window.
For example:

This is how PyCharm looks. On the right side, you can switch between dark or light themes. On the left side, right-clicking gives you various options related to Python files, code, directories, environment, and more.
Step 4: Run your Program on PyCharm IDE
The final step is to run a program to check whether everything is working properly. Let’s create a file named demo.py. Here, .py is the extension for Python files. Write a simple program like this:
print("Hello, World!")Right-click and select Run. You will see the output on your screen. In our case, the output is: Hello, World!
For example:

You may also notice that PyCharm is much more user-friendly than IDLE. For example, even if you type a single letter like “P”, PyCharm automatically shows all the matching suggestions.
For example:

So yes, it provides smart suggestions and makes coding easier. That’s why we personally recommend PyCharm for beginners.
We will continue using PyCharm throughout this programming series. If you are not comfortable with IDLE, feel free to use any IDE of your choice. But if not, you can continue with PyCharm. We hope that now you clearly understand how to install PyCharm and how to use it. If you still have any doubts or questions, feel free to ask in the comment section.
From the next article onwards, we will start learning the core concepts of Python programming because all the installation steps are now completed. So stay connected, and yeah, that’s all for today’s article. Thanks for reading till the end!
“So keep learning, keep growing!”

21 Comments
Best osm
I like this
Very good
Supper
Very good
Very good
It’s good
it is good
Good Website
Good
Very good
Good
I like it
Sh USB TB
Nice website
Best website ever seen
Very good website for learning.
Nice
Yas
Nice
So good website